Measuring quantities on a commercial set
Name the Subject, keep the page on the row, and split the sheets with the other office. Stairs and rails are the worked example. You still decide the scope.
A commercial set is more than one scope. Concrete you self-perform, doors on a schedule, studs, and a stair package that only exists if you open the enlarged plan. You name each Subject the way the estimate already says it. The other office should be able to open the same Project and see the same Markups List, with the page on every row.
You still decide what is in the bid. The software does not. It saves the retype, and it saves the second PDF in email. Save the Subject on a Tool Chest tool on this desk so the next Length, Count, or Area starts with your name. If the template needs a step the desk does not have, we change the software to fit it.
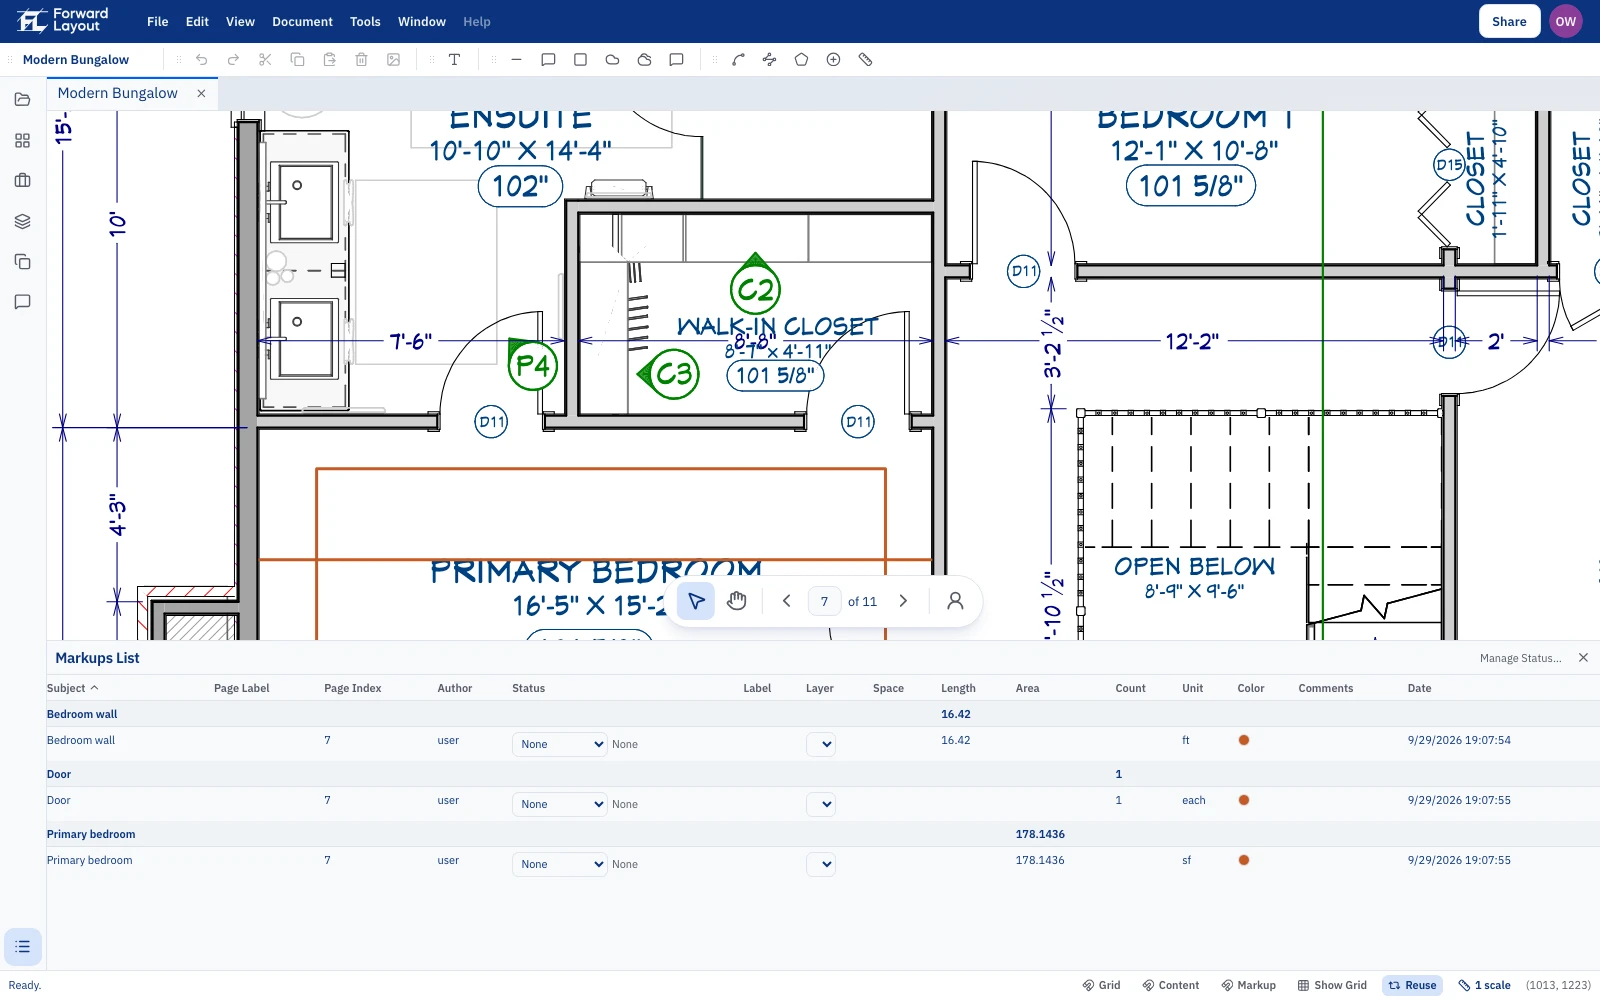
Stairs and rails are the worked example below, because those quantities are scattered and easy to mash together. The same habits apply to the rest of the set.
One package: stairs and rails
Stair and rail quantities are rarely on one sheet with a total. You will open the index, then spend time finding that the open edge on Level 2 only fully exists on an enlarged plan. That’s the hunt. The rest of this page is the craft: what to measure, what to count, and what to write down so pricing can defend the number.
Before you measure
Write what you’re bidding in plain English. Stairs only? Stairs and rails? Slab edges and ramps too? Interior, exterior, or both (finish will change cost later)? Whose details win when they disagree: architect typical, structural, or a fabricator standard buried in Division 05 or a NAAMM callout?
NIC / by others / OFCI goes in that same paragraph. Future-you, arguing with a PM, is part of the audience.
Guardrail and handrail are two rows
People say rails. On the takeoff, split them.
Guardrail keeps people from falling. Handrail is the grippable piece that helps them walk the stair. Sometimes the handrail bolts to the guard. Sometimes it’s on the wall. Your local building department has opinions about when each one shows up. Check them. Keep them as two LF rows.
On the page: guardrail is LF along the open edge. Watch returns, mid-landing rails, gates (yours?), and edges that only exist on the enlarged plan.
Handrail is also LF. Classic miss: one side drawn as “typical,” the other side still real when someone walks the stair.
Pickets, balusters, spindles (the verticals that keep openings under the four-inch rule) usually belong in a note or the estimate (“¾″ sq @ ~4″ o.c.”), not inside the guardrail LF. Same for fancy terminations. Note them. They are not top-rail footage.
Plan length vs the length you actually weld
On stairs, the plan projection is shorter than the rail along the pitch. A lot of shops take sloping (developed) length so material and labor track what gets built. If you take plan length, say so in the notes, and make sure your estimating rates expect plan length. Mixing plan LF with slope rates is a quiet way to lose margin.
Flat landings and level runs use plan length. Don’t slope-factor a mezzanine edge out of habit.
Posts are each
Posts drive base plates, embeds, core drills, and a large share of labor. On the fab floor, layout is king. Wrong post heights, or a cut that’s a fraction of a degree off, and you’re tearing it apart. Count them carefully.
Prefer, in order: a post schedule or marks on plan; a dimensioned spacing on a detail you trust; then a shop standard written down as an assumption, not treated as if the drawing showed it.
“About 5′-0″ o.c.” from a thin typical detail belongs in the note column. Also count things that act like posts when the label is shy: newels, corners, wall returns that become verticals, posts that vanish on one sheet and reappear on another.
Flights, then the rails that live on them
Treat stair flights as EA so nobody loses a whole run on the page. Stringers, channel, clips, pans, rise/run: that often lives deeper in the estimate. When the detail language gets specific, NAAMM’s Metal Stairs Manual (AMP 510) is the product shelf, not your takeoff row. Keep the flight count obvious. Losing a flight is the classic miss.
For each flight, chase left and right rail, landing rails that keep going, winders / curves / switchbacks (slow down), and whether temporary construction stairs sit next to the final ones. Sets do that. Later somebody may check bullnose-to-bullnose with a story stick. Your job first is deciding which flights are in the package.
A path through the set
Sheet index first: tag stair, rail, enlarged, and detail numbers. Plans where the geometry is honest. Elevations and sections for extensions and wall returns the plan flattened. Details for bases, brackets, and “typical” notes that multiply across floors. Pipe rail language often tracks NAAMM AMP 521. Specs for finishes and loadings that change cost when LF doesn’t. Addenda last, because that’s where the mezzanine rail appears after you were done.
The rail you forget is often on the page you opened once and never tagged. When geometry turns into a code argument instead of a measuring argument, keep Access Board stairs and OSHA stairways one click away, then still measure what’s drawn. More of that bookshelf: References.
Make the qty sheet boring
Useful rows look like this on purpose:
| Item | Qty | Unit | Page | Note |
|---|---|---|---|---|
| Guardrail | 86.00 | LF | 12 | Stair A, 3/A5.2; sloping |
| Handrail | 42.50 | LF | 12 | Wall side |
| Post | 18 | EA | 12 | ~5′-0″ o.c., confirm |
| Stair flight | 2 | EA | 8 | North egress |
No dollar column required. Dollars are estimating’s job. Notes that a teammate can defend are required. That’s the CSV shape we export. You drop it into Excel.
While you’re measuring (Bluebeam, this desk, or a scale ruler), calibrate on a dimension you trust (why scale matters), name runs as you go, mark exclusions so pricing doesn’t invent scope, and sanity-check totals. If Level 2’s open edge jumped from about 40 LF to about 140 LF after a zoom, you probably calibrated on the wrong tick.
Checklist
Wall returns. Both sides when only one is “typical.” Mid-landing rails and extensions past nosings. Gates and latch posts. Rails on equipment pads / RTU platforms hiding on mechanical sheets. Exterior finish on a run that started interior. Pickets and infill noted or counted, not silently inside guard LF. Post layout assumptions written down.
If your team has a “we always miss X” story, X belongs on a checklist the other office can see.
Auto-counts and models can look strong on clean demos. On messy commercial sets, treat them like a junior looking at the page: maybe useful, only after someone who can catch a missing landing rail verifies, with a trail you can audit. Does AI takeoff actually work is the longer version.
The set, not one trade: commercial preconstruction takeoff. A measure desk, not another platform: takeoff without a platform. Still in Revu? Get the list into Excel. Formal shelf: references. Who can open a Project: how work is organized. The other office on the same set: Working together. No install: Browser desk. Same Project on every device: cloud sync.
Straight answers
- Do you measure guardrail and handrail separately?
- Usually yes. Guardrail keeps people from falling; grippable handrail helps them walk the stair. Different members, different fab, often different finishes. One combined “rail LF” makes pricing and shop travelers harder.
- Should I use plan length or sloping length for stair rails?
- Use the length that matches how you buy and build. Many shops take sloping (developed) length for rails on stairs; plan-only length understates material and weld inches on the pitch.
- Should post spacing come from the drawing or a shop standard?
- Prefer the drawing and specs. If the set only shows “typical,” write your assumed layout (spacing) in the notes and flag it. Don’t silently invent a dense post layout.